Showing posts with label Sewing Projects. Show all posts

Thursday, July 31, 2014

Clutches Clutches Clutches!!!

Have you been following me on Instagram??? If so, you know I've been working like a maniac making Clutches! I've been getting orders for them like crazy! I wanted to give a little shout out to those of you who aren't on instagram though.

I've recently decided to make wallets using "The Necessary Clutch" pattern by Emmaline Bags. If you've been wanting a new wallet/clutch feel free to contact me by any means! I'm happy to take custom orders. I love making them and it really helps our little family out with the bills! Our budget has been pretty tight lately and I figured this was a good way to help make ends meet.

So why aren't these on my Etsy? Well, I've been getting so much positive feedback and requests that I really haven't had the time to make extras to list on Etsy. It also helps to avoid extra fees for me and the buyer.

Here are some examples of what I've recently made...

Now, I don't like to duplicate any wallet. So what you see above will be the ONLY one made like that. I'm sorry if you LOVE it but I really want each wallet to be completely unique and special to that owner. Plus...I'm working from my personal stash. I'd like to keep some of my fabric please. I might be able to make an exception on certain prints due to excess yardage available.

If you're interested in a wallet, please email me or leave a comment with your email. We'll discuss colors, styles, fabric designers, & payment info. Thank you all so much!!!


Tuesday, July 15, 2014

Retro Rucksack Blog Tour


Retro Rucksack | Radiant Home Studio


Yay! It's my turn on the Retro Rucksack Blog Tour! Welcome to my blog if this is your first time here. Have a look around and stay awhile. I've teamed up with Sara of Radiant Home Studio to showcase her great pattern for the Retro Rucksack. 


I gotta tell you that I've never made a bag like this before and was a little nervous to get started in fear that I'd screw it up somehow or another. First, I set out for a great print for the bag. I scored some fabulous Denyse Schmidt County Fair Home Decor fabric and thought it'd be perfect! 

Retro Rucksack


The bag came together nicely and actually fairly quickly. The pattern was clear and easy to understand. The pictures were a huge help whenever I wanted to triple check something.  All in all I had a great time putting this bag together and would recommend the pattern hands down! You can purchase the pattern on Sara's website along with a couple of other great patterns as well! 


Retro Rucksack


Be sure to check out the other blogs and their version of this fabulous bag!

Retro Rucksack Inspiration Tour:

Monday, July 14th Radiant Home Studio || Sweeter Than Cupcakes 
Tuesday, July 15th Quarter Incher || Dandelion Drift 
Wednesday, July 16th Glitter + Wit || EmmylouBeeDoo 
Thursday, July 17th Casa Crafty || Behind the Hedgerow 
Friday, July 18th SewVery || Raspberry Sunshine 
Saturday, July 19th Mia's Creations || Made By Sara 


Friday, May 9, 2014

I'm back peeps! Come check out some colorfulness...

Hello everyone!


It's feels good to be back! For those of you who are wondering...baby Lincoln is doing great! Things are getting adjusted around here and everyone is doing fine. Charlie just loves him. I just had my 6 week postpartum appointment and was given the green light on resuming normal activities as well as exercising. I'm really looking forward to spending more time outside and getting into shape....for reals this time.

I'll post more pics of the baby soon :)


Anyways...
With another sleeping schedule to get used to, I've only had the time and energy to sew a couple things. I finally put together The Social Tote by Carolyn Friedlander. I went for a bright modern version. The outside fabric and pincushion prints are from Ziggy by French Bull, the trim is Waterfront Park Domino Dots by Michael Miller and the inside polka dot print is something I picked up at Hobby Lobby forever ago. I love the way it holds my stuff and looks so pretty doing it!


Here are the March Scrapbeelicious Bee blocks for Liz I somehow managed to get done. I seriously don't really own any low volume prints so I really had to dig into my scraps for this one! And...all the half square triangles were a total pain in the butt so I don't think I'll be making anymore of these blocks. The trimming alone was insanity I tell you. Great block but a lot of work! This is definitely a block to choose for a quilting bee. Now onto the April blocks!


I also worked on a birthday package for Nicole of Snip Snippets for our Birthday Bash Swap.  I totally forgot to take pictures though so you'll have to wait until she gets it! Sorry, baby brain. This month is my birthday so I get to take a break from this swap until June. Yay!!!

Well I better run! Catch you later!

Don't forget about Giveaway Day starting this Monday! I'll have some goodies to share with you!

Monday, March 17, 2014

Design Challenge: Embroidered Baby Blocks Tutorial

Sew Lux Fabric Designer Challenge: Baby Blocks

Happy St. Paddy's Day! I have a fun tutorial for you but it's not green!

With a baby on the way, choosing a project for my Design Challenge for Sew Lux Fabric wasn't too difficult. Since I'm having a boy I thought some Red, White & Blue blocks would be fun. When I spotted the Sailboat print in their inventory, I knew that was the theme and pulled other fabrics to match. 

To read my fun Q&A's for the Challenge Click here!


Sew Lux Fabric Design Challenge


If you're interested in purchasing these prints, please visit Sew Lux Fabric to grab the bundle here! The red prints pictured above are substitutes for what I used but still really fun!


Here's what you need to get started:

  • 6 Fat Quarters (There will be plenty of fabric left over)
  • Pins
  • Polyfil
  • Hand Sewing Needle
  • Hand Quilting Thread
  • Perle Cotton (optional)
  • Regular Writing Pen for drawing pattern on paper
  • Water-Soluble Fabric Pen or Frixion Pen for drawing embroidery design on block

Let's get started!

Tuesday, March 4, 2014

Zakka Along 2.0 Patchwork, Please - iPad Cover & Prettified Pincushion

I'm finally finishing up the last few projects in the Patchwork, Please Book by Ayumi Takahashi. Phew! Pregnancy really put me behind didn't it? The sew along ended forever ago it seems. Well I had a few swaps and birthdays come up where the last few items were just too perfect for the occasion.

Originally I wasn't going to make the iPad Cover because well...I don't own an iPad. Say it isn't so! Yep! I'm lame and haven't joined the iPad craze. I do have a tablet, just not the iPad. I don't use it as much as I probably should so I don't feel left out. I could always adjust the pattern to fit my tablet but ehh...whatever.

Anyways, I ended up making one anyhow because of a birthday and I needed to make a gift. I thought the Clipboard fabric from Type would be fun paired with Pink Pearl Bracelets. The other fabrics were fun to throw in too. I opted to machine bind because I haven't been in the mood to hand bind anything lately...no thank you.

Patchwork, Please - iPad Cover

Patchwork, Please - iPad Cover


I also managed to make the Prettified Pincushion. I used natural linen and some fun colorful scraps that would really pop against the tan. The bottom is some hot pink corduroy fabric I had on hand. I filled it up with crushed walnut shells for weight. The button really makes the pincushion doesn't it? It's so....well...pretty! Like sprinkles on a cupcake. I was really tempted to keep this for myself but was strong. I wrapped it up with my swap items as a little extra and sadly packaged everything up. Ready to mail out to my partner this week. Sniff...I'm jealous that my partner gets to keep it and not me.

Patchwork, Please - Prettified Pincushion

Patchwork, Please - Prettified Pincushion

Patchwork, Please - Prettified Pincushion

That's it for now. Better get on with the next thing on my list!


Sunday, February 9, 2014

Quick Finish, Quick Satisfaction

For some reason I felt the need for a quick finish. Must be these pregnancy hormones or something! As if the Tula Pink City Sampler didn't wear me out enough...seriously. Well, I had this cute little Moda Mini Charm Pack sitting on my shelf taunting me, begging me to be made into something. What the heck am I supposed do with 1 of these? They're cute but seriously it's hardly any material. I think I got it free with something I ordered a while ago or something.

Moda Baby Jane Mini Charm Pack


I had no idea what to make with a mini so I figured a zippered pouch was a good call. We can never have enough of these! They're always getting used in some way or another. I didn't really have a plan so I just started to sewing the little squares together. I figured out the placement I liked and adjusted some of the directional prints for a pouch. Duplicates were used in the middle 2 rows since that would be the bottom. I decided to hand quilt it but couldn't decide which color to use because they were all great! With some help of Instagram friends Yellow was the winner!


I decided to finished off the pouch in the style of this tutorial from Quarter Inch Mark. I love the way the binding looks on it. With the hand quilting done and the binding picked out....here is the finished product. Love the way it turned out! Perfect for on-the-go projects! And it cleared off an almost tiny nothing on my shelf....haha....so not much progress in that department.

This little cutie used 1 whole mini charm pack. 40 squares for the pouch and 2 for the zipper tabs. Perfect!


Tuesday, January 7, 2014

Toy Stroller Makeover!

How many of you own or owned one of these for your kids?


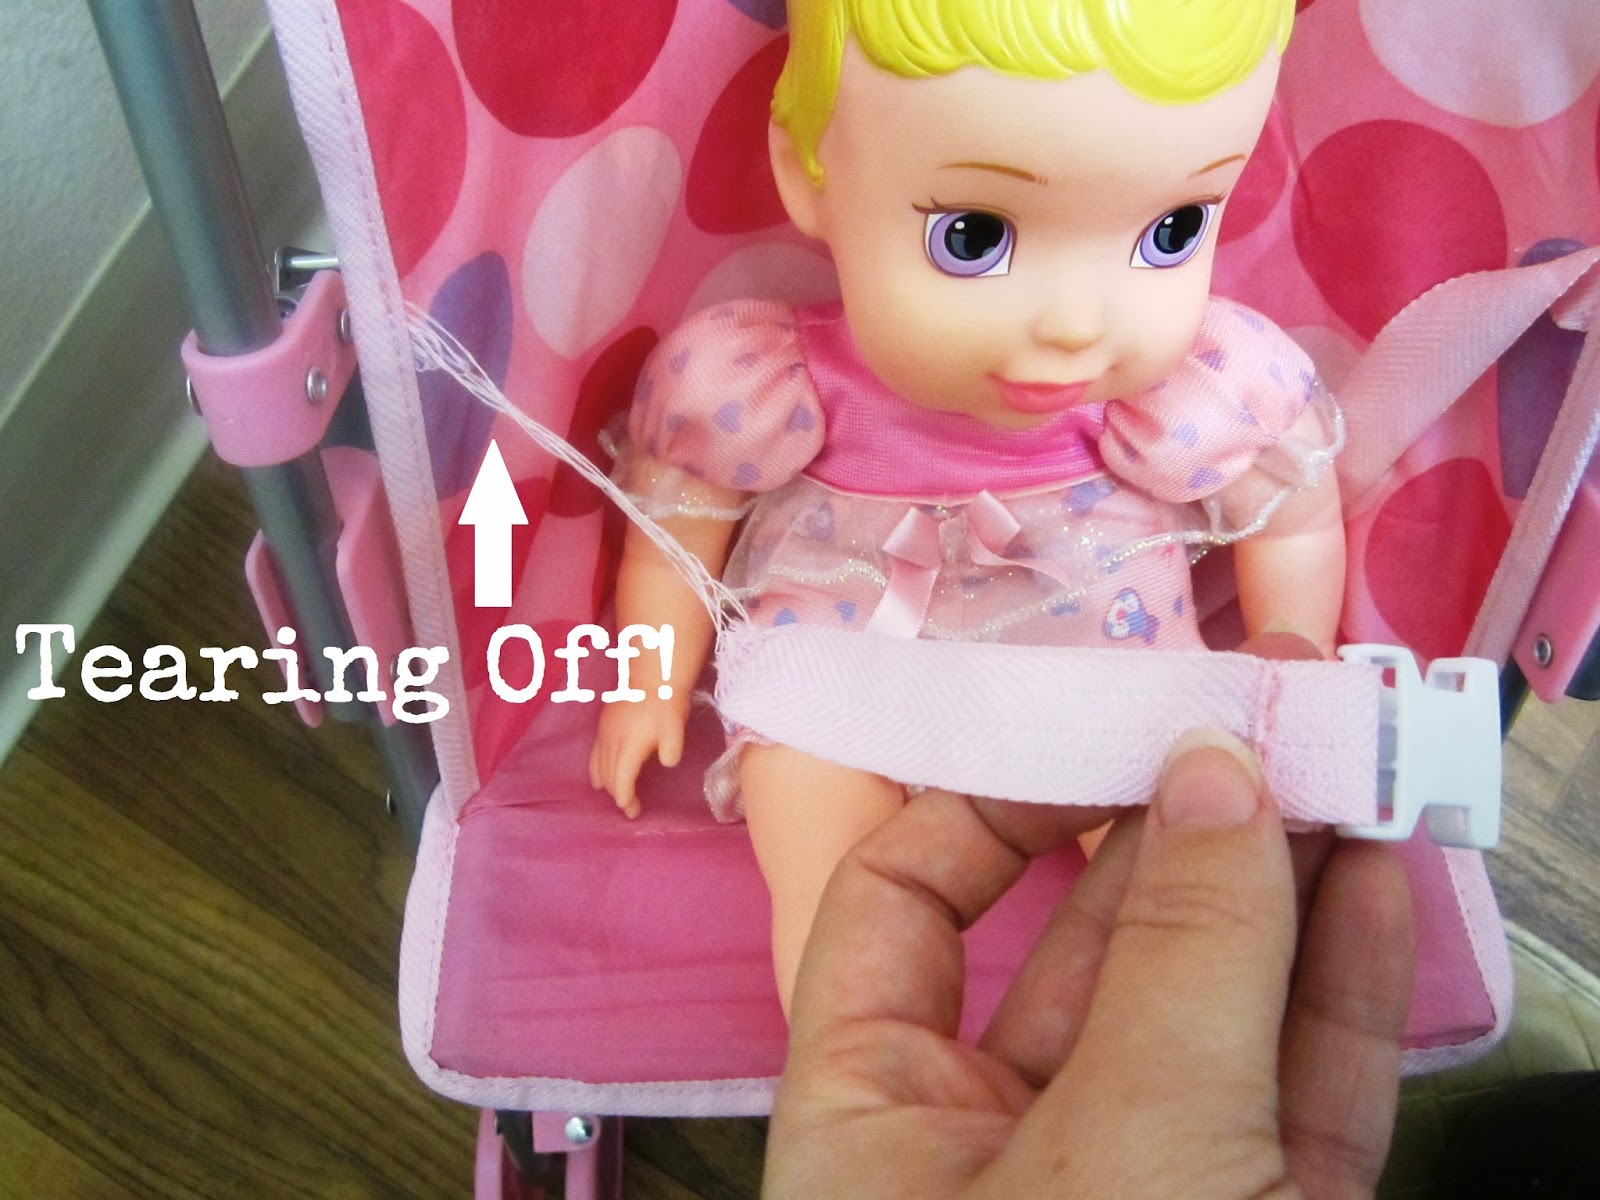
My daughter Charlie got one for Christmas from her Grandma and was soooo excited! Within 5 minutes, Grandma thought it would be "fun" to put Charlie in it instead of a baby doll. 

Yep..probably not the best idea. Charlie wants to sit and stand on it all the time now. Ugh! We've only had it for 1.5 weeks and this is already happening...


So I decided to give this little thing a makeover and make it a little sturdier. I used some cute flannel I had that matched the pink & purple wheels perfectly. I wanted the straps to be fun too so I pulled a super fun pink polka-dot  ribbon to match. I bound the whole thing with some purple seersucker fabric I hadn't bother to use for anything yet. Here's the final result! What do you think?!


I like it sooo much better than the original thin fabric. Isn't it adorable with her little baby?! 


Saturday, September 7, 2013

Zakka Along 2.0 Patchwork, Please - Triangle Patchwork Box Pouch

Sorry I'm late to the party! I completed the box pouch and I'm ready to show it off to you! I've been pouring my energy into something else at the moment. I'll write a post about it soon!


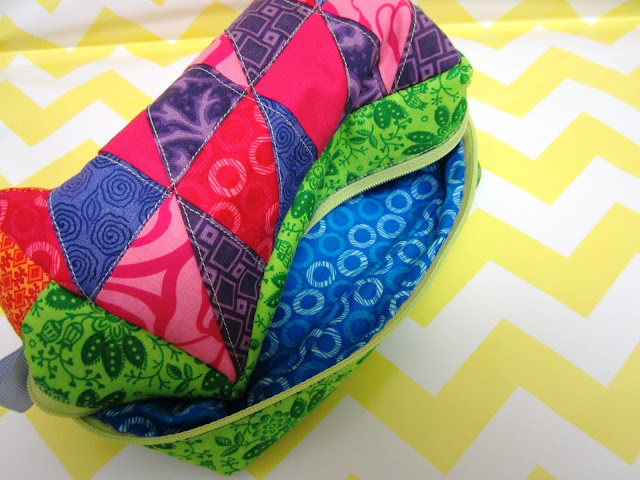
I had some help picking out the fabrics from a 4 year old I was babysitting this week. She needed something fun to do. I throw her a bunch of fat quarters and she picked out all the prints. She insisted on a pink & purple pouch. I didn't finish it in time before she left yesterday but I told she could have it when it was all done.

Zakka Along 2.0 Patchwork, Please - Triangle Patchwork Box Pouch

post signature

Thursday, August 29, 2013

Zakka Along 2.0 Patchwork, Please - Piece-Of-Cake Shopping Bag

Of all the projects in the book...I was sort of looking forward to this one. When it was all said and done...this bag is just plain weird. It doesn't really have any shape or anything. I just looks like a pile of fabric when it's all completed. You really have to stuff it to see what it actually is and how cute it can be. I didn't want to use my "good" fabrics so I chose some left over orange Home Decor print I happen to have a lot of and some prints that could go with it....I guess. I would probably like it better if I did use my good fabrics....sigh. I should have went with pink & purple with the orange instead of the blue. Oh well!

I consider this more of a sampler bag. I think it would be really cute if it was maybe half the size. It would just be a way more functional bag that way. There is absolutely no way I would actually shop for my groceries with this. It's so big that it would weigh a ton. It seems to be a great bag for laundry however!

Zakka Along 2.0 Patchwork, Please - Piece-Of-Cake Shopping Bag

Zakka Along 2.0 Patchwork, Please - Piece-Of-Cake Shopping Bag

Zakka Along 2.0 Patchwork, Please - Piece-Of-Cake Shopping Bag

Zakka Along 2.0 Patchwork, Please - Piece-Of-Cake Shopping Bag

Zakka Along 2.0 Patchwork, Please - Piece-Of-Cake Shopping Bag

post signature

Monday, August 26, 2013

I'm a Hexie Queen today with a GIVEAWAY!


Hexie Queen Hop

Welcome to my blog all Sew We Quilt readers! It's my turn on the "Be a Hexie Queen" Blog Hop. 

I love hexagon projects but haven't really made any prior to this hop. Can you believe that? I don't know why it took me so long to get around to do something entirely made of hexagons. Maybe it's the fact that I don't feel like sewing them by hand one at a time or that "Y" seams are intimidating if they're precut? Those are both pretty good reasons to me...

When I first started my blog, I made a 12" mini quilt with a hexagon flower but nothing since then.

Hexagon Mini Quilt


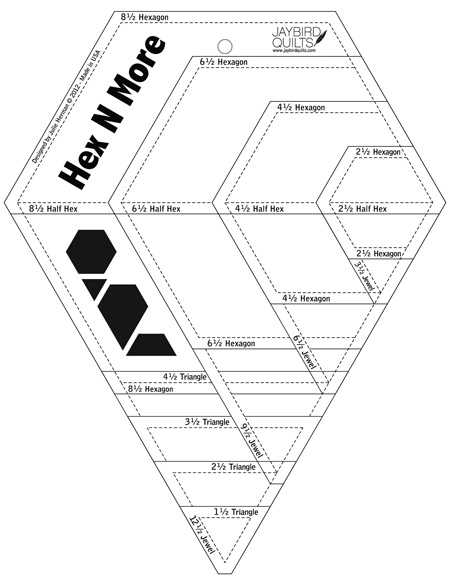
This blog hop was a great push to get me to do something fun! I started thinking about what I wanted to do and decided to make a cute little pouch. Picking out fabrics is always the hardest best part of any project. I decided to go with only 3 prints instead picking big enough pieces from my scrap stash in all different colors. I used the "Hex N More" Ruler from Jaybird Quilts. It worked great and I was able to cut perfect 2.5" hexies for my pouch.

Hex N More Ruler by Jaybird Quilts
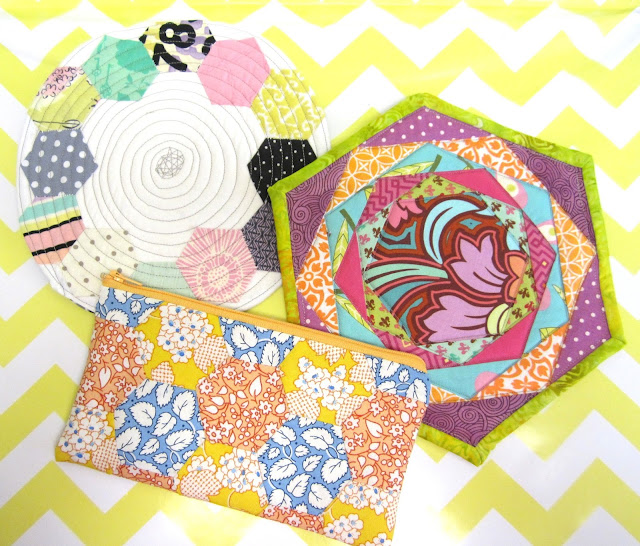
Well, I got over my irrational fear of "Y" seams and here's what the little cutie ended up looking like. I gotta admit...I'm impressed with my first try. I was expecting an epic fail!
Hexagon Pouch by Stephanie @ Quarter Incher

Hexagon Pouch by Stephanie @ Quarter Incher

Here's a few other projects I made along with this cute pouch. The Hexagon Trivet pattern is from the book "Patchwork, Please" by Ayumi Takahashi. The white one is something I whipped up a few days ago.

Hexie Queen Blog Hop


Who wants this cute little hexagon pouch? I'm comfortable enough to give it away to a special reader! I'll fill it up with a bunch of 2.5" hexagons to help get you started with a hexie project of your own! I'll make sure all the fabrics are fun modern prints in styles that I usually use. If you scroll through my blog posts you'll know what I mean. Use the rafflecopter below to enter!

(A little hint: I'm doing another giveaway on Sunday...you definitely won't want to miss it!)

a Rafflecopter giveaway

Thanks for visiting my blog for the hop! I hope you have fun bouncing from blog to blog finding new inspiration for any hexagons you have laying around. Enjoy your day!


Don't forget to check out the other lovely blogs on the hop today!

post signature